How to Make Cold Herbal Infusions
Cold herbal infusions – no heat, no fuss, just herbs and time. Draw flavor from chamomile and silky mucilage from marshmallow root with simple kitchen tools.
How to Make Cold Herbal Infusions
A gentle way to draw out flavor and plant compounds from delicate and mucilaginous herbs
What You’ll Learn
Cold infusions are the simplest herbal preparation you can make. No heat, no fuss – just herbs, water, and time. It’s a flavor and texture choice: cold water gives delicate herbs (like chamomile or lemon balm) a smooth, mellow taste, and lets mucilaginous herbs (like marshmallow root) release their silky gel.
Think of it as the slow, no-heat cousin of iced tea, gentler and more versatile. You’ll get a smooth, never-bitter brew that keeps the delicate flavors intact.
What You’ll Need
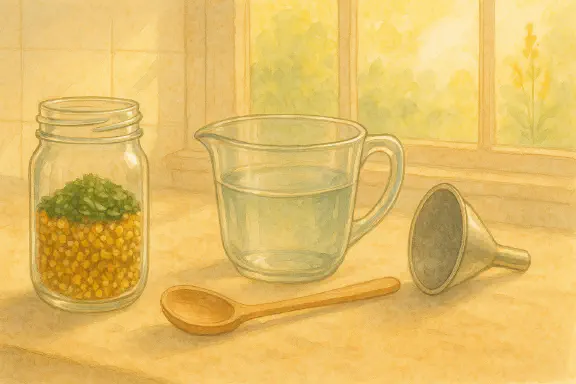
Basic Equipment (already in your kitchen)
- Quart-size glass jar with lid ad (mason jars are perfect)
- Fine mesh strainer ad or clean kitchen towel
- Wooden spoon ad for stirring
- Measuring cup ad (optional – we’ll use the simpler’s method)
Nice-to-Have Tools (if you want to make life easier)
- French press ad – works like a charm for straining
- Muslin bags or large tea ball ad – contains the herbs for easy removal
- Funnel ad – helps when transferring to storage bottles
Ingredients
- Dried herbs: About 1/4 jar full (roughly 1 ounce or 3–4 tablespoons) (see our herb drying guide)
- Fresh herbs: About 1/2 jar full (roughly 2 cups loosely packed)
- Cool or room-temperature water (filtered tastes best)
Step-by-Step Instructions
1. Prepare Your Herbs
Place your herbs in the clean jar. For dried herbs, fill about 1/4 of the jar – that’s an inch or two at the bottom. For fresh herbs, fill about halfway. Don’t pack them tight; let them have room to move.
If using roots or bark, break them into smaller pieces. Fresh herbs? Give them a gentle bruise or rough chop to help release their goodness.
Only use herbs you can identify with certainty. Rinse fresh herbs to remove dirt and pick out any spoiled bits (safety notes).
2. Add Water
Pour cool or room-temperature water over the herbs until they’re covered by 1–2 inches. Fill the jar nearly to the top. The herbs might float at first – that’s fine. Give everything a gentle stir to eliminate air bubbles.
Note: Some folks use lukewarm water to speed things up a bit, but never hot – that defeats the whole purpose.
3. Cover and Wait
Cap the jar with its lid. Now comes the easy part – waiting.
Timing guidelines:
- Delicate leaves and flowers: 4–6 hours
- Roots and bark: 8–12 hours in the fridge (overnight works great)
- Mucilaginous herbs: 6–12 hours in the fridge
Iowa State and Illinois Extension say brewed tea shouldn’t sit at room temperature for more than 8 hours. We count the whole time out of the fridge, steep included, against that cap. A short steep (well under 8 hours) can sit on the counter, and anything longer goes in the fridge (safety notes).
No heat kills bacteria in a cold infusion, so keep the jar, lid and tools clean. Ohio State’s advice for tea: “Wash, rinse and sanitize tea-making equipment regularly” (safety notes).
4. Strain and Store
Pour your infusion through a strainer into a clean jar or pitcher. Press the herbs gently with the back of a spoon to get the last drops – especially important with mucilaginous herbs like marshmallow, where that gel-like liquid is pure gold.
Transfer to a storage jar, label with the herb name and date, and refrigerate immediately. Our advice: use it within 24–48 hours, and fresh-herb infusions within 24 hours. Toss it if it smells off, turns cloudy when it shouldn’t, fizzes or shows any mold (safety notes).
Fresh vs. Dried Herbs: What’s Different?
Quantities
- Dried herbs are concentrated, so you need less (see our guide for drying herbs)
- Fresh herbs contain water, so use about twice the volume
- When in doubt, err on the side of more – cold extraction is gentle
Flavor & Potency
- Fresh herbs give brighter, more aromatic infusions
- Dried herbs work year-round and give consistent results
- Both make wonderful infusions – use what you have
Storage & Safety
- Our advice: fresh herb infusions spoil faster, so use them within 24 hours
- Our advice: dried herb infusions keep up to 48 hours refrigerated
- Always rinse fresh herbs to remove dirt and check for spoiled bits
Storage & Shelf Life
- Refrigerate immediately after straining
- Our advice: use within 24–48 hours (fresh-herb infusions within 24) – these aren’t like tinctures that last forever
- Signs it’s gone bad: Sour smell, cloudiness, fizzing, or any mold
- Pro tip: Freeze extras in ice cube trays for later use
Safety Notes
- Only use herbs you can identify with certainty
- Start with small amounts to test for sensitivities
- If it smells off or looks cloudy (when it shouldn’t be), toss it
- Mucilaginous herbs naturally create thick, gel-like liquids – that’s normal
- Keep everything clean – we’re not using heat to kill bacteria. Ohio State’s advice for tea: “Wash, rinse and sanitize tea-making equipment regularly” (Ohio State University Extension)
- Room temperature: “Brewed tea should not be held at room temperature for more than 8 hours” (Iowa State University Extension; Illinois Extension gives the same 8-hour limit). We count all time out of the fridge, steep included
- Fridge: Our advice: use cold infusions within 24–48 hours, and fresh-herb infusions within 24 hours
- Sun tea: Skip it. Iowa State Extension says “Sun tea gets warm enough to brew tea, but it does not get hot enough to kill bacteria or any other microorganism” that may be on tea or herb leaves (Iowa State University Extension)
- Pregnant or nursing? Check individual herb safety in plant guides
- If you take prescription medicine or have a health condition, talk to your doctor or pharmacist before using herbs medicinally
Three Easy Recipes to Start
Before you drink any of these, start with a small amount to test for sensitivities. If you’re pregnant or nursing, check each herb’s safety in its plant guide. If you take prescription medicine or have a health condition, talk to your doctor or pharmacist first (safety notes).
1. Cold Marshmallow Root Infusion
A traditional, silky drink
- 1/4 jar dried marshmallow root pieces
- Cool water to cover by 2 inches
- Steep 8–12 hours in refrigerator
- Result: Slightly thick, golden liquid with mild sweet taste
- We don’t have a marshmallow root guide yet, so the doctor-or-pharmacist check above matters here (safety notes)
2. Garden-Fresh Mint & Lemon Balm Cooler
Perfect for hot summer days
- 1 cup fresh mint leaves, lightly bruised
- 1 cup fresh lemon balm leaves
- Room-temperature water to fill
- Steep 4–6 hours. Skip sun tea: sunlit water doesn’t get hot enough to kill bacteria (Iowa State Extension; safety notes).
- Result: Light, refreshing, never bitter
- Read the cautions in our peppermint (if that’s your mint) and lemon balm guides before you drink it (safety notes)
3. Cold-Brewed Evening Chamomile
Sweet and mellow, without the bitterness
- 3 tablespoons dried chamomile flowers
- 1 tablespoon dried mint (optional)
- Cool water to fill
- Steep 4–6 hours
- Result: Sweet, apple-like flavor, golden color
- Read the cautions in our chamomile guide (and the peppermint guide if you add mint) before you drink it (safety notes)
Tips for Success
- Shake occasionally during steeping to help extraction
- Taste as you go – you’ll learn your preferred strength
- Mix and match herbs once you’re comfortable
- Keep notes on what works for your family
- Don’t reuse herbs – compost them after one infusion
When to Use Other Methods
Cold infusions work beautifully for many herbs, but sometimes you’ll want:
- Hot infusions for tougher materials or when you need warmth
- Decoctions for hard roots and bark (See our guide to decoctions.)
- Tinctures for longer shelf life (See our guide to tinctures.)
The Bottom Line
Cold infusions are your gateway to herbal medicine. No special equipment, no complicated steps – just herbs, water, and patience. Start with one simple recipe, get comfortable, then expand your repertoire. Before you know it, you’ll have a refrigerator full of homemade brews and a family asking for more.
Remember: The best herbal preparation is the one you’ll actually make and use. Keep it simple, keep it safe, and enjoy the process.